Design a Photoshop like Logo in Photoshop
Designing attractive logos is a major challenge among Graphic Designers. Anyway the use of Adobe Photoshop makes this more easier. Let's learn, how to design a logo like Photoshop in Photoshop..!
Here is the final result you'll getting at the end of this tutorial.

Step 1
Go to File → New... or press Ctrl + N.

Step 2
Give a Name to the file and set it's Width and Height as 800 px and click OK.

Step 3
Now click on Set foreground color and set it as #28ccf8 and click OK. Then choose the Paint Bucket Tool.

Click to paint the layer completely. You can do this with the Fill option too.

Step 4
Now, go to View → Rulers. You can also press the Ctrl + R to get rulers. Rulers are essential for our forward steps.

Step 5
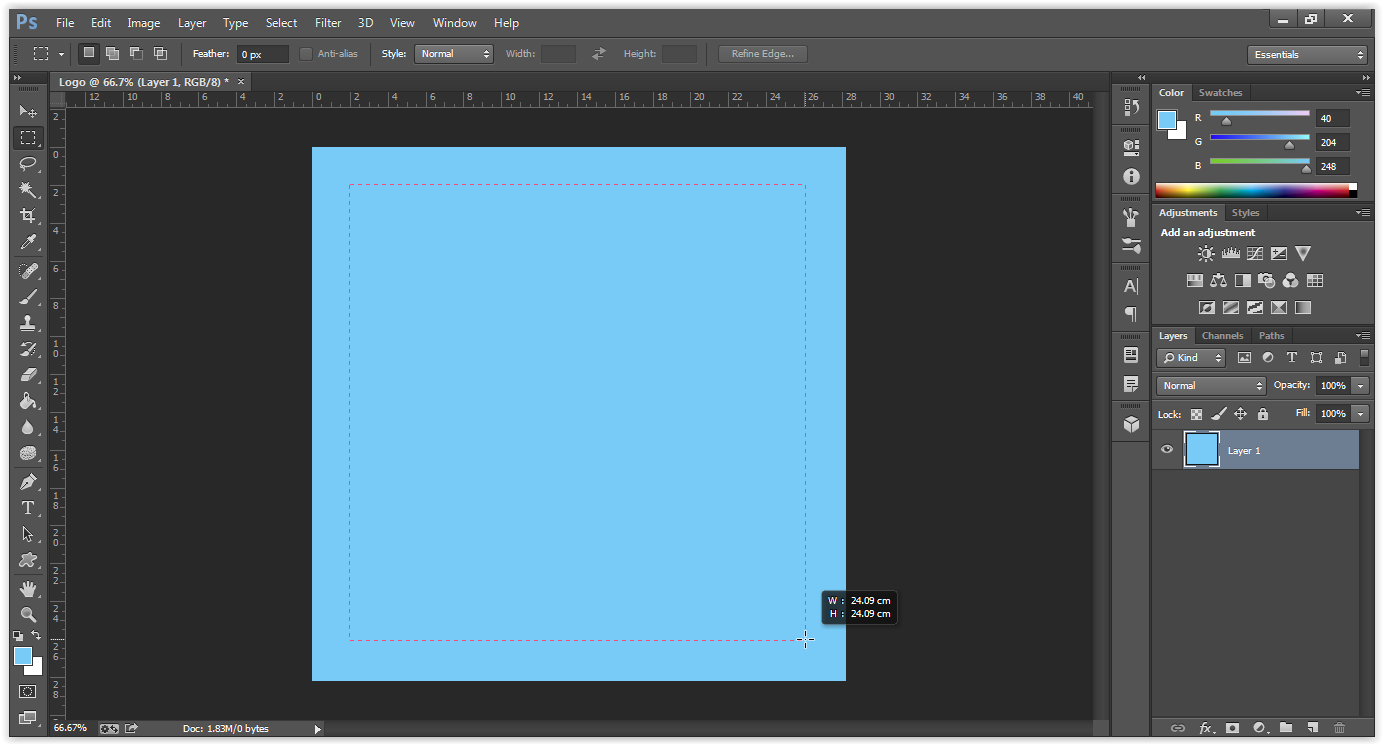
Select Rectangular Marquee Tool from the Selection Tools.

Use it to select the inner portion as shown below in the screenshot. [Note] Make sure you've equal widths horizontally and vertically from the borders. Otherwise it will give a nasty look ..☹..!
Step 6
Then press the Delete button. Now, it will look like as in the screenshot below.

Step 7
Again choose Set foreground color and set it to #130f2e. Fill the blank space with that color.

Step 8
After that choose Type Tool. Set Font as Myriad Pro.

Set the Font Style as Bold Condensed.

Set the Font Size as 500 pt.

Set the Anti-aliasing method as Smooth.

Step 9
Now, type what do you want to appear as your logo. Use Rulers to align the text to center from all directions.

When finished, your logo will appear as something like this:

Step 10
Save it in PNG format, as it is best for logos.
If you've any doubts, share it below and I'll reach you as soon as possible.
Here is the final result you'll getting at the end of this tutorial.
Step 1
Go to File → New... or press Ctrl + N.
Step 2
Give a Name to the file and set it's Width and Height as 800 px and click OK.
Step 3
Now click on Set foreground color and set it as #28ccf8 and click OK. Then choose the Paint Bucket Tool.
Click to paint the layer completely. You can do this with the Fill option too.
Step 4
Now, go to View → Rulers. You can also press the Ctrl + R to get rulers. Rulers are essential for our forward steps.
Step 5
Select Rectangular Marquee Tool from the Selection Tools.
Use it to select the inner portion as shown below in the screenshot. [Note] Make sure you've equal widths horizontally and vertically from the borders. Otherwise it will give a nasty look ..☹..!
Step 6
Then press the Delete button. Now, it will look like as in the screenshot below.
Step 7
Again choose Set foreground color and set it to #130f2e. Fill the blank space with that color.
Step 8
After that choose Type Tool. Set Font as Myriad Pro.
Set the Font Style as Bold Condensed.
Set the Font Size as 500 pt.
Set the Anti-aliasing method as Smooth.
Step 9
Now, type what do you want to appear as your logo. Use Rulers to align the text to center from all directions.
When finished, your logo will appear as something like this:
Step 10
Save it in PNG format, as it is best for logos.
If you've any doubts, share it below and I'll reach you as soon as possible.


Great.. and simple..! Thanks for posting..
ReplyDelete